
|
|
|
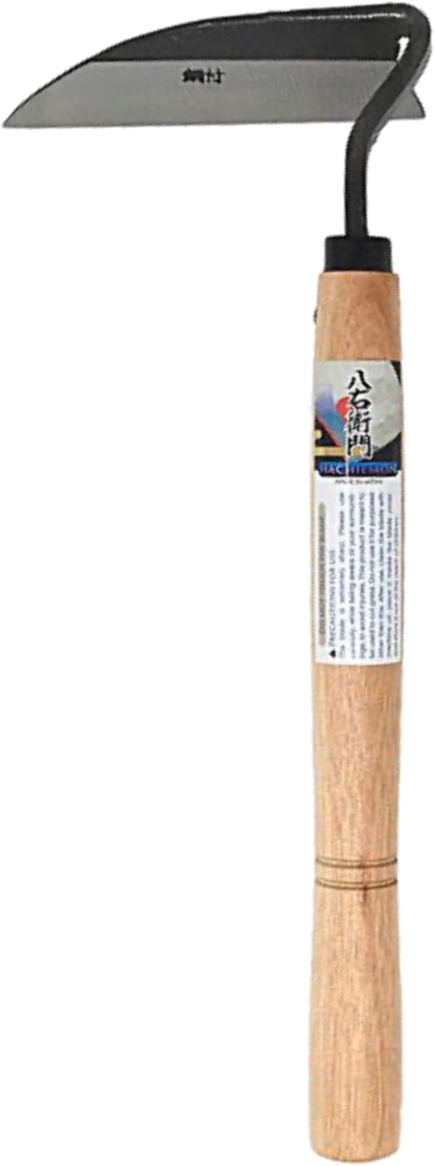
Japanese Weeding Sickle |

Edge Angle
The Weeding Sickle is sharpened by grinding the outside edge (the side of the blade's edge not shown in the picture to the left). Unlike a garden hoe, this tool is swung differently. Thusly, grinding on the outside of the edge does not set make the tool's use problematic.
Lee Valley Tools sells a Yankee Weeder which is much like this, however the grind is on the inside edge. The α angle should be the same; however the Tormek KJ-45 & SVM-45 jigs will not work to sharpen this tool.
A 6" smooth cut machinist’s hand file is useful to carry in your gardening tools box. Use it to resharpen the tool as needed throughout the gardening activity.
Gardens bring us into contact with the cycles and irrefutable laws of nature, teaching us indelible lessons about ourselves and about the messy, difficult, and beautiful processes of living.
Cait Johnson
|
General Guidelines |
|||
| α |
Sharp
|
Notes |
|
|---|---|---|---|
| 30° |
|
The edges will need to be deburred using a very fine machinist's hand file, or it can be honed using the honing wheel on the Tormek. |
|
The Tormek SG-250 grindstone works well for sharpening this tool.
If grinding this tool on the Tormek, grind the outside edge using the Tormek's vertical position (with the grindstone rotating towards the edge).
Japanese gardening tools are typically made from high-carbon steel which is not terribly hard. When this is combined with an acute angle like 30°, it is easy to damage the edge.
Changing this tool to have a higher angle like 45° is not recommended. Instead, the gardener should use a different tool, especially where the blade could come into contact with hard objects such as gravel. These could impart significant damage to the blade of this tool.
For removing large nicks in the edge, a Tormek grinder or a 12-14" bastard file machinist’s hand file will work sufficiently well. Experience has shown that either of these approaches works quite well in removing nicks from the edge after my wife or children have used the tool.

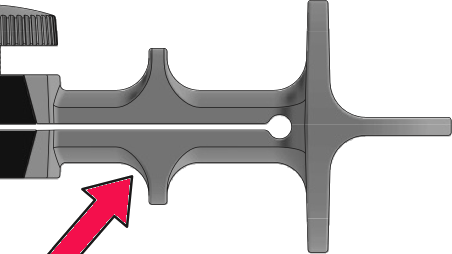
Point which gets rounded over
One common problem is that the pointed end of the cutting edge gets rounded over. If this happens, the back side will need to be reshaped to get the end back to a point. The side needing to be ground is shown to the right with the red arrow. The side of the tool is flat ground, keeping the edge angles as they were originally made.
There is a Tormek video on YouTube, Tormek Live Sharpening Class - Part 15. Repair a damaged knife, which outlines such reshaping activities quite well.
This may seem an onerous task, but it only takes a few minutes, and the usefulness of the tool will be maintained.
Using a bench or angle grinder is not recommended as this will surely overheat the tool, removing the temper from the edge. Additionally, the shaping of the edge is difficult to control.
KJ-45 Bottom Stop
KJ-45 attached to a Japanese Weeding Sickle
If using a Tormek with the KJ-45 jig, the bottom stop is recommended (as indicated in the picture to the left). This makes setting the angle easier.
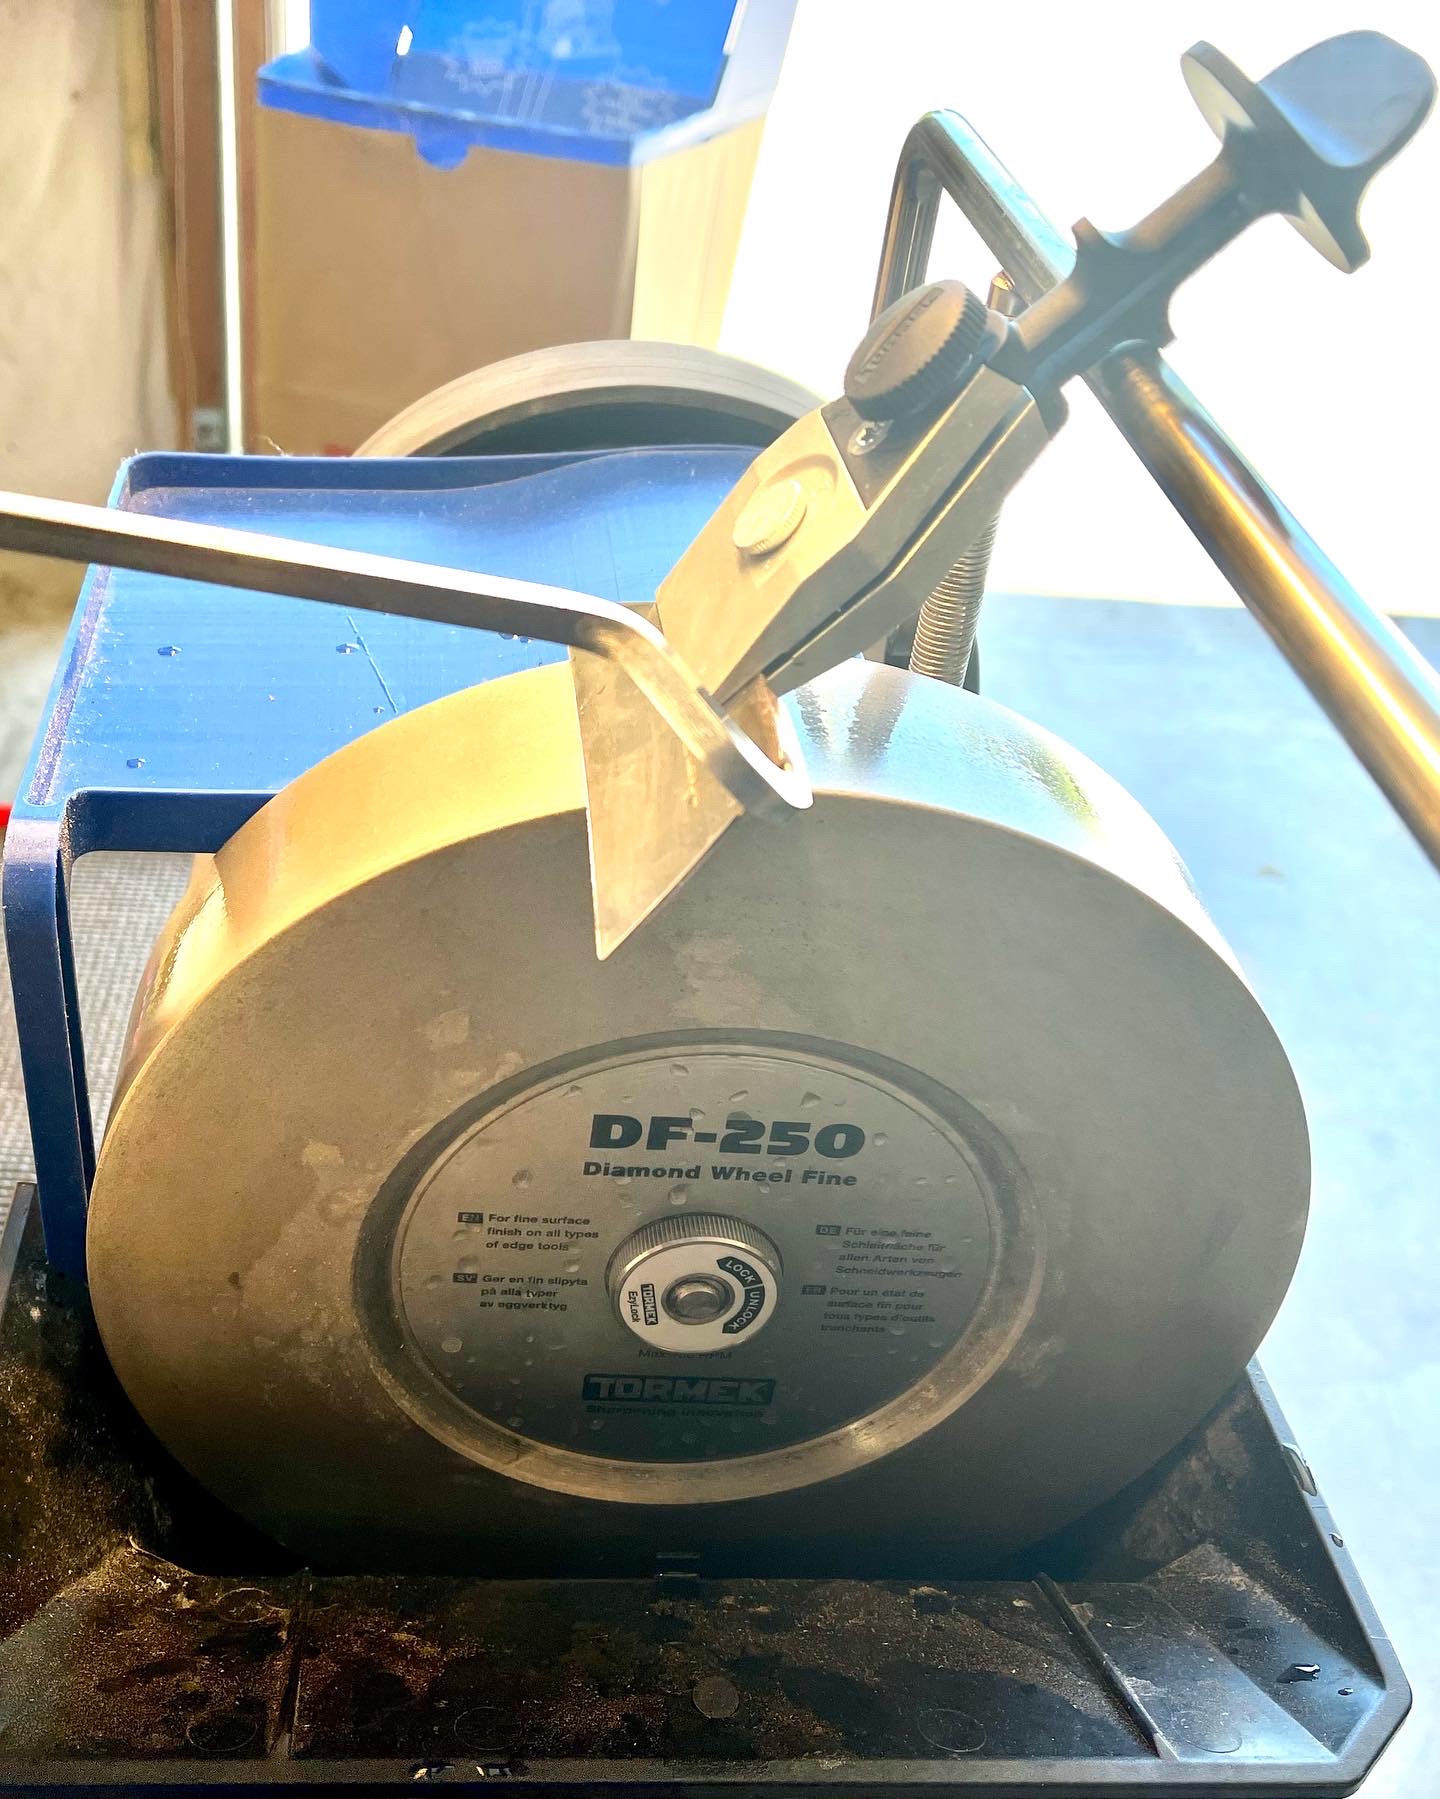
The picture on the right shows a Japanese weeding sickle being sharpened on a Tormek (the blue piece behind the grinding wheel is a drip tray).
If you choose to use a machinist’s hand file,
Micro bevel Notes:
A micro bevel could make the resharpening of this tool easier if resharpened away from the other sharpening tools. Even if the tool was sharpened in the shop using a Tormek, the gardener could use a machinist's hand file for a quick touch-up. In general though, it is not needed on this tool.

Example icon
Sharpness scales (as shown in the grey icon to the left) are used to indicate the recommended sharpness for the blades noted above. You can click on any of the icons showing the sharpness scale and be redirected to the page describing this more. Lower numbers are duller; higher numbers sharper.
These are general recommendations; you will need to use your own judgment, based on the knive’s intended purpose.