
|
|
|
Bonsai Scissors |
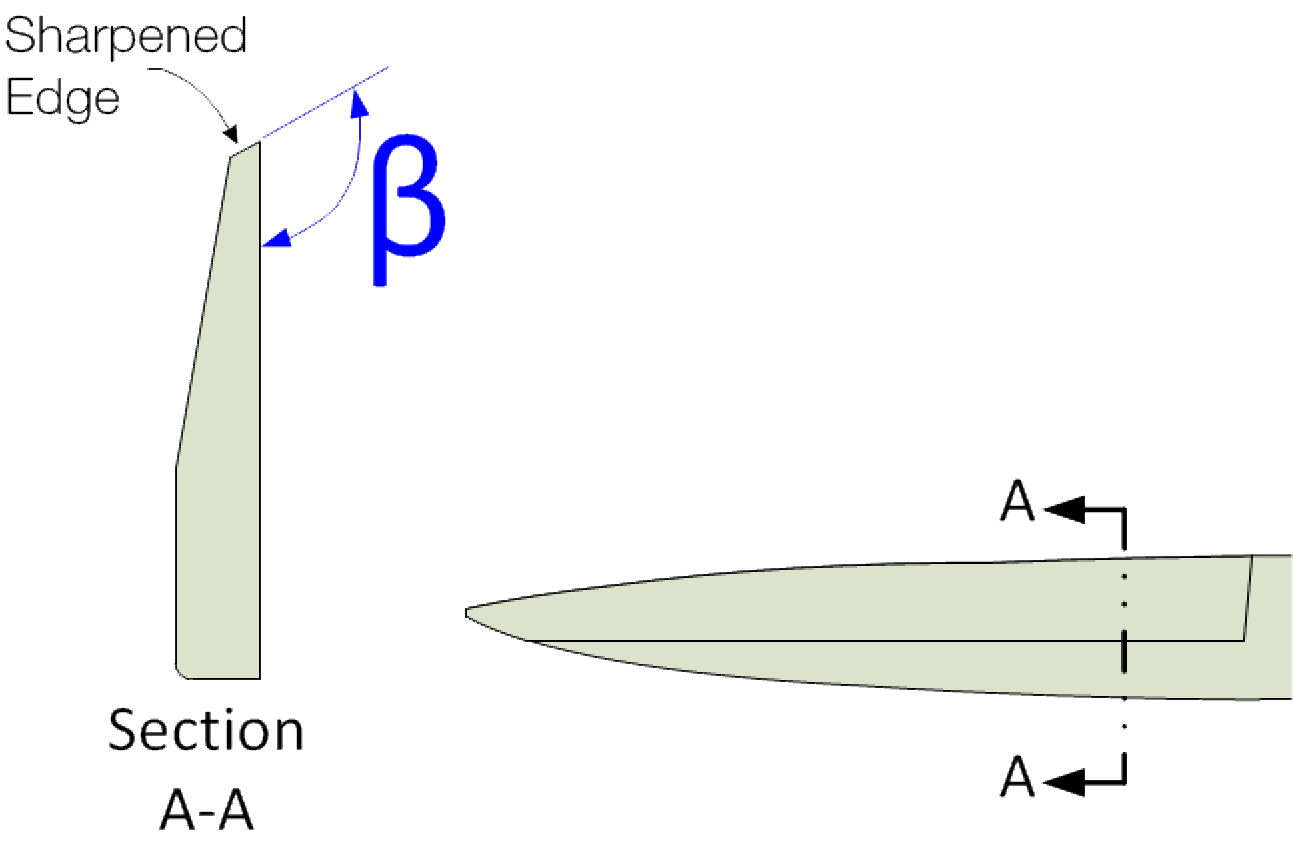
Sectional view of the cutting blade

Scissor parts
Guidelines shown below are for Bevel Angles (β).
Some scissors have differing angles for the Thumb Blade (shown in red) vs. the Fingers Blade (shown in blue). In those cases, separate angles are shown in the table below.
Bonsai is not just about growing trees, it's about growing yourself.
John Naka

|
General Guidelines |
|||||
|---|---|---|---|---|---|
|
Type |
βThumb | βFingers |
Sharp
|
Notes |
|
| Bud Scissors | 120° |
|
|
||
| Pruning Scissors | 120° |
|
|
||
| Trimming Scissors | 120° |
|
These can be sharper to make the trimming easier. |
||
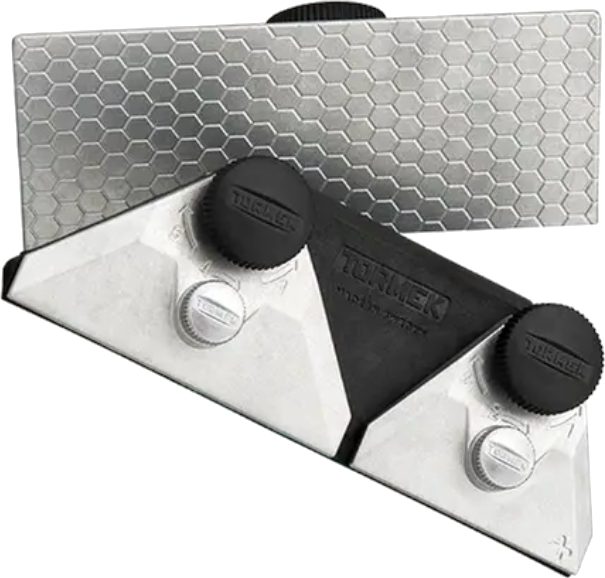
Tormek SC-60 Scissors Jig
When sharpening the scissor’s blades, the Tormek SC-60 Scissors Jig or the SVX-150 Scissors Jig works well.
Use of diamond wheels is not recommended unless the scissors are made from a very hard steel. The sharpness of the angle for sharpening can damage the wheel. (And the SG grindstone works quite well.)
When sharpening scissors, use the vertical position with the grindstone rotating towards the blade. This keeps the scissors jig properly aligned to the grindstone. (If you use the horizontal position, the grindstone will pull the scissors away from the jig.)
However, if you are sharpening left-handed scissors and they cannot be disassembled into the two pieces, you will need to sharpen from the horizontal position as the piece not being sharpened would interfere with the process otherwise (it would hit the Tormek machine).

Scissors align correctly

Scissors with gap at the ends

Scissors with bottom blade too long

Scissors with top blade too long
After sharpening, if the tips of the of the scissors do not meet, the length of one or both blades should be shortened. The most commonly seen is in the second picture where there is simply a gap at the ends where they should meet.
The black lines in the bottom 3 pictures to the left outline (in a very exaggerated manner) the shape of the blades after the ends have been shortened.
This can generally be done on the same grinding wheel as the one used to sharpen the blade. The sharpener should also check to ensure there are no sharp edges on the backs of the blades which are raised by doing this. If this happens, those should be cleaned up.
Note to the sharpener: if the scissors are very high quality, you may want to talk with the owner before making any of these adjustments.
As you do this more often, you may find that you can identify this risk before starting the sharpening process. If so, it is best to secure approval before making any changes to what may be very beloved scissors (especially if they were handed down from a loved family member).

Example icon
Sharpness scales (as shown in the grey icon to the left) are used to indicate the recommended sharpness for the blades noted above. You can click on any of the icons showing the sharpness scale and be redirected to the page describing this more. Lower numbers are duller; higher numbers sharper.
These are general recommendations; you will need to use your own judgment, based on the knive’s intended purpose.
The shape of the grind used is a call best made by the tool's use, based on your own experience. Additional notes are available on separate web pages for Grind Profiles, and Micro / Secondary Bevels.
New bonsai schssors should not needed to be reshaped. However, they may need work if a nick is incurred in the blade.
The Tormek SG-250 grindstone works well for this. Alternatively, handheld diamond honing tools (such as those made by DMT) or small machinist’s hand files are often sufficient for reshaping the tool's cutting edge, especially as most bonsai cutting tools are made from high carbon steel. If your tools are stainless steel, a more aggressive hand file may be necessary.
The Tormek SG-250 grindstone, graded finely, works well for this.
Finer grit, handheld diamond honing tools (such as those made by DMT) or small machinist’s hand files are sufficient.
This is a great video showing some great techniques on how to achieve the sharpened tools.
Note: I don't agree with using hydrogen peroxide to disinfect the tools as advocated by the author of this video. Hydrogen Peroxide (H2O2) is also an oxidizing agent which will cause your tools to rust.
